m (→Minerva's Den: links) |
(→BioShock 2: added Atlantic Express aug. maps, fixed PT Folly of Dionysus map) Tag: Visual edit |
||
| (21 intermediate revisions by 4 users not shown) | |||
| Line 9: | Line 9: | ||
#Capturing screenshots of maps in each level at the highest resolution possible. (''See the [[BioShock Wiki:Map Project#Map Quality Requirements|Map Quality Requirements and Tips]] section for more information about capturing images.'') |
#Capturing screenshots of maps in each level at the highest resolution possible. (''See the [[BioShock Wiki:Map Project#Map Quality Requirements|Map Quality Requirements and Tips]] section for more information about capturing images.'') |
||
| − | #Stitching the map screenshots together in an image editing software if the map is too large for a single screenshot. |
+ | #Stitching the map screenshots together in an image editing software if the map is too large for a single screenshot. |
| − | #Uploading the map images to the wiki and placing them in the [[:Category: |
+ | #Uploading the map images to the wiki and placing them in the [[:Category:Level Maps|correct map categories]]. |
#If possible, creating an [[MW:Imagemap|ImageMap]] with coordinates for each icon on the map and links to articles about the objects the icons represent. (''See the [[BioShock Wiki:Map Project#Making Imagemaps|Making ImageMaps]] section for more details.'') |
#If possible, creating an [[MW:Imagemap|ImageMap]] with coordinates for each icon on the map and links to articles about the objects the icons represent. (''See the [[BioShock Wiki:Map Project#Making Imagemaps|Making ImageMaps]] section for more details.'') |
||
#Placing each map image on a subpage of the level article it will be displayed in. (''See the [[BioShock Wiki:Map Project#Making Subpages|Making Subpages]] section.'') |
#Placing each map image on a subpage of the level article it will be displayed in. (''See the [[BioShock Wiki:Map Project#Making Subpages|Making Subpages]] section.'') |
||
| Line 18: | Line 18: | ||
====Map Quality Requirements and Tips==== |
====Map Quality Requirements and Tips==== |
||
*When taking screenshots of a map in ''BioShock 2'' and its DLCs, always zoom in as far as possible on each level and take as many overlapping screenshots as are needed to capture the whole map. |
*When taking screenshots of a map in ''BioShock 2'' and its DLCs, always zoom in as far as possible on each level and take as many overlapping screenshots as are needed to capture the whole map. |
||
| − | *< |
+ | *<span style="text-decoration:underline;">Do not</span> use the '[[Wikipedia:Print screen|Print screen]]' button to take screenshots. Instead, use the "<span style="font-family: monospace;">Shot</span>" [[Console Commands|console command]] to save a bmp screenshot to the same directory as your User.ini file. This will allow you to create much higher quality screenshots. |
| − | *Map screenshots should include all icons which have stationary locations. This means that the screenshots < |
+ | *Map screenshots should include all icons which have stationary locations. This means that the screenshots <span style="text-decoration:underline;">should</span> include icons for all vending machines as well as the ADAM corpse icons which can only be seen when the player is with a Little Sister. The screenshots <span style="text-decoration:underline;">should not</span> include the icons for dropped Little Sisters or quest arrows, since these move around. |
*Once you have all the needed screenshots, piece them together in an image editing software. |
*Once you have all the needed screenshots, piece them together in an image editing software. |
||
**For a map with multiple floors, create separate layers for each floor. Make sure that all overlapping rooms line up correctly between floors. |
**For a map with multiple floors, create separate layers for each floor. Make sure that all overlapping rooms line up correctly between floors. |
||
| Line 48: | Line 48: | ||
Once all the subpages are created, the Tab view extension is used to display the maps within the level article. See [[Help:Tab view]] for a detailed explanation about how to use the extension. |
Once all the subpages are created, the Tab view extension is used to display the maps within the level article. See [[Help:Tab view]] for a detailed explanation about how to use the extension. |
||
#In the level article, create a "Map" section under a new heading. |
#In the level article, create a "Map" section under a new heading. |
||
| − | #Within the Map section, create a Tab view display with the following format (example from the Adonis Luxury Resort article):<div style="background-color: #013354; border: 1px dashed #2F6FAB;"><nowiki><tabview></nowiki><br>Adonis Luxury Resort/L0|Level Zero||true<br>Adonis Luxury Resort/L1|Level One<br><nowiki></tabview></nowiki></div> |
+ | #Within the Map section, create a Tab view display with the following format (example from the Adonis Luxury Resort article):<div style="background-color: #013354; border: 1px dashed #2F6FAB;"><nowiki><tabview></nowiki><br>Adonis Luxury Resort/L0|Level Zero Orig.||true<br>Adonis Luxury Resort/L0 extra|Level Zero<br>Adonis Luxury Resort/L1|Level One Orig.<br><nowiki></tabview></nowiki></div> |
| − | #Always place < |
+ | #Always place <span style="font-family: monospace;">||true</span> to the right of the floor that the player first appears in when the level starts. This will make it the default tab that shows when the article first loads. |
If many custom maps are created for a level, the number of tabs might spill over into two rows. When that happens, the tabs might need to be specially formatted with code in [[MediaWiki:Wikia.css]]. In that case, contact [[User:Gardimuer|Gardimuer]] to have the changes made. |
If many custom maps are created for a level, the number of tabs might spill over into two rows. When that happens, the tabs might need to be specially formatted with code in [[MediaWiki:Wikia.css]]. In that case, contact [[User:Gardimuer|Gardimuer]] to have the changes made. |
||
| Line 66: | Line 66: | ||
|[[Adonis Luxury Resort#Map|Adonis Luxury Resort]] |
|[[Adonis Luxury Resort#Map|Adonis Luxury Resort]] |
||
|[[Adonis Luxury Resort/L0|L0]], [[Adonis Luxury Resort/L1|L1]] {{Icon|yes}} |
|[[Adonis Luxury Resort/L0|L0]], [[Adonis Luxury Resort/L1|L1]] {{Icon|yes}} |
||
| + | |[[Adonis Luxury Resort/L0 extra|L0 extra]], [[Adonis Luxury Resorts/L1 extra|L1 extra]]{{Icon|yes}} |
||
| − | |{{Icon|no}} |
||
| − | |{{Icon| |
+ | |{{Icon|yes}} |
|- |
|- |
||
|[[Atlantic Express (Level)#Map|Atlantic Express]] |
|[[Atlantic Express (Level)#Map|Atlantic Express]] |
||
|[[Atlantic Express (Level)/L1|L1]], [[Atlantic Express (Level)/L2|L2]], [[Atlantic Express (Level)/L3|L3]], [[Atlantic Express (Level)/L4|L4]] {{Icon|yes}} |
|[[Atlantic Express (Level)/L1|L1]], [[Atlantic Express (Level)/L2|L2]], [[Atlantic Express (Level)/L3|L3]], [[Atlantic Express (Level)/L4|L4]] {{Icon|yes}} |
||
| + | |[[Atlantic Express (Level)/L1 extra|L1 extra]], [[Atlantic Express (Level)/L2 extra|L2 extra]], [[Atlantic Express (Level)/L3 extra|L3 extra]], [[Atlantic Express (Level)/L4 extra|L4 extra]] {{Icon|yes}} |
||
| − | |{{Icon|no}} |
||
| − | |{{Icon| |
+ | |{{Icon|yes}} |
|- |
|- |
||
|[[Ryan Amusements (Level)#Map|Ryan Amusements]] |
|[[Ryan Amusements (Level)#Map|Ryan Amusements]] |
||
|[[Ryan Amusements (Level)/L1|L1]], [[Ryan Amusements (Level)/L2|L2]], [[Ryan Amusements (Level)/L3|L3]] {{Icon|yes}} |
|[[Ryan Amusements (Level)/L1|L1]], [[Ryan Amusements (Level)/L2|L2]], [[Ryan Amusements (Level)/L3|L3]] {{Icon|yes}} |
||
| + | |[[Ryan Amusements (Level)/L1 extra|L1 extra]] , [[Ryan Amusements (Level)/L2 extra|L2 extra]], [[Ryan Amusements (Level)/L3 extra|L3 extra]] {{Icon|yes}} |
||
| − | |{{Icon|no}} |
||
| − | |{{Icon| |
+ | |{{Icon|yes}} |
|- |
|- |
||
|[[Pauper's Drop (Level)#Map|Pauper's Drop]] |
|[[Pauper's Drop (Level)#Map|Pauper's Drop]] |
||
|[[Pauper's Drop (Level)/L1|L1]], [[Pauper's Drop (Level)/L2|L2]], [[Pauper's Drop (Level)/L3|L3]], [[Pauper's Drop (Level)/L4|L4]], [[Pauper's Drop (Level)/L5|L5]] {{Icon|yes}} |
|[[Pauper's Drop (Level)/L1|L1]], [[Pauper's Drop (Level)/L2|L2]], [[Pauper's Drop (Level)/L3|L3]], [[Pauper's Drop (Level)/L4|L4]], [[Pauper's Drop (Level)/L5|L5]] {{Icon|yes}} |
||
| + | |[[Pauper's Drop (Level)/L1 extra|L1 extra]], [[Pauper's Drop (Level)/L2 extra|L2 extra]], [[Pauper's Drop (Level)/L3 extra|L3 extra]], [[Pauper's Drop (Level)/L4 extra|L4 extra]], [[Pauper's Drop (Level)/L5 extra|L5 extra]] {{Icon|yes}} |
||
| − | |{{Icon|no}} |
||
| − | |{{Icon| |
+ | |{{Icon|yes}} |
|- |
|- |
||
|[[Siren Alley#Map|Siren Alley]] |
|[[Siren Alley#Map|Siren Alley]] |
||
|[[Siren Alley/L0|L0]], [[Siren Alley/L1|L1]], [[Siren Alley/L2|L2]], [[Siren Alley/L3|L3]] {{Icon|yes}} |
|[[Siren Alley/L0|L0]], [[Siren Alley/L1|L1]], [[Siren Alley/L2|L2]], [[Siren Alley/L3|L3]] {{Icon|yes}} |
||
| + | |[[Siren Alley/L0 extra|L0 extra]], [[Siren Alley/L0 extra|L1 extra]], [[Siren Alley/L0 extra|L2 extra]], [[Siren Alley/L0 extra|L3 extra]]{{Icon|yes}} |
||
| − | |{{Icon|no}} |
||
| − | |{{Icon| |
+ | |{{Icon|yes}} |
|- |
|- |
||
|[[Dionysus Park#Map|Dionysus Park]] |
|[[Dionysus Park#Map|Dionysus Park]] |
||
| Line 96: | Line 96: | ||
|[[Fontaine Futuristics (Level)#Map|Fontaine Futuristics]] |
|[[Fontaine Futuristics (Level)#Map|Fontaine Futuristics]] |
||
|[[Fontaine Futuristics (Level)/L1|L1]], [[Fontaine Futuristics (Level)/L2|L2]], [[Fontaine Futuristics (Level)/L3|L3]], [[Fontaine Futuristics (Level)/L4|L4]] {{Icon|yes}} |
|[[Fontaine Futuristics (Level)/L1|L1]], [[Fontaine Futuristics (Level)/L2|L2]], [[Fontaine Futuristics (Level)/L3|L3]], [[Fontaine Futuristics (Level)/L4|L4]] {{Icon|yes}} |
||
| − | |[[Fontaine Futuristics (Level)/L1 extra|L1 extra]], [[Fontaine Futuristics (Level)/L2 extra|L2 extra]], [[Fontaine Futuristics (Level)/L4 extra|L4 extra]] {{Icon|yes}} |
+ | |[[Fontaine Futuristics (Level)/L1 extra|L1 extra]], [[Fontaine Futuristics (Level)/L2 extra|L2 extra]], [[Fontaine Futuristics (Level)/L3 extra|L3 extra]], [[Fontaine Futuristics (Level)/L4 extra|L4 extra]] {{Icon|yes}} |
|{{Icon|yes}} |
|{{Icon|yes}} |
||
|- |
|- |
||
| Line 106: | Line 106: | ||
|[[Inner Persephone#Map|Inner Persephone]] |
|[[Inner Persephone#Map|Inner Persephone]] |
||
|[[Inner Persephone/L1|L1]], [[Inner Persephone/L2|L2]], [[Inner Persephone/L3|L3]], [[Inner Persephone/L4|L4]], [[Inner Persephone/L5|L5]] {{Icon|yes}} |
|[[Inner Persephone/L1|L1]], [[Inner Persephone/L2|L2]], [[Inner Persephone/L3|L3]], [[Inner Persephone/L4|L4]], [[Inner Persephone/L5|L5]] {{Icon|yes}} |
||
| + | |[[Inner Persephone/L2 extra|L2 extra]], [[Inner Persephone/L3 extra|L3 extra]], [[Inner Persephone/L4 extra|L4 extra]] {{Icon|yes}} |
||
| − | |{{Icon|no}} |
||
| − | |{{Icon| |
+ | |{{Icon|yes}} |
|} |
|} |
||
| Line 117: | Line 117: | ||
|- |
|- |
||
|[[The Adonis Baths#Map|The Adonis Baths]] |
|[[The Adonis Baths#Map|The Adonis Baths]] |
||
| + | |[[The Adonis Baths/L1|L1]] {{Icon|yes}} |
||
| − | |[[:File:PT_Adonis_Baths.png]] (needs cleanup) |
||
| − | |{{Icon| |
+ | |{{Icon|yes}} |
|- |
|- |
||
|[[Atlantic Express Train Upkeep#Map|Atlantic Express Train Upkeep]] |
|[[Atlantic Express Train Upkeep#Map|Atlantic Express Train Upkeep]] |
||
|[[Atlantic Express Train Upkeep/L1|L1]], [[Atlantic Express Train Upkeep/L2|L2]] {{Icon|yes}} |
|[[Atlantic Express Train Upkeep/L1|L1]], [[Atlantic Express Train Upkeep/L2|L2]] {{Icon|yes}} |
||
| − | |{{Icon| |
+ | |{{Icon|yes}} |
|- |
|- |
||
|[[Pauper's Drop Market#Map|Pauper's Drop Market]] |
|[[Pauper's Drop Market#Map|Pauper's Drop Market]] |
||
|[[Pauper's Drop Market/L1|L1]], [[Pauper's Drop Market/L2|L2]] {{Icon|yes}} |
|[[Pauper's Drop Market/L1|L1]], [[Pauper's Drop Market/L2|L2]] {{Icon|yes}} |
||
| − | |{{Icon| |
+ | |{{Icon|yes}} |
|- |
|- |
||
|[[Simon Wales' Church#Map|Simon Wales' Church]] |
|[[Simon Wales' Church#Map|Simon Wales' Church]] |
||
|[[Simon Wales' Church/L1|L1]], [[Simon Wales' Church/L2|L2]] {{Icon|yes}} |
|[[Simon Wales' Church/L1|L1]], [[Simon Wales' Church/L2|L2]] {{Icon|yes}} |
||
| − | |{{Icon| |
+ | |{{Icon|yes}} |
|- |
|- |
||
|[[Folly of Dionysus#Map|Folly of Dionysus]] |
|[[Folly of Dionysus#Map|Folly of Dionysus]] |
||
| − | |[[ |
+ | |[[Folly of Dionysus/L1|L1]] {{Icon|yes}} |
| − | |{{Icon| |
+ | |{{Icon|yes}} |
|- |
|- |
||
|[[Persephone Cell Block F#Map|Persephone Cell Block F]] |
|[[Persephone Cell Block F#Map|Persephone Cell Block F]] |
||
| − | |[[ |
+ | |[[Persephone Cell Block F/L1|L1]] {{Icon|yes}} |
| − | |{{Icon| |
+ | |{{Icon|yes}} |
|} |
|} |
||
| − | ====[[:Category:Minerva's Den DLC Maps|Minerva's Den]]==== |
+ | ====[[:Category:Minerva's Den (DLC) Maps|Minerva's Den]]==== |
{|cellpadding=3px class="sortable pricelist" style="color:white; text-align:left;" |
{|cellpadding=3px class="sortable pricelist" style="color:white; text-align:left;" |
||
!class="header"|Level |
!class="header"|Level |
||
| Line 149: | Line 149: | ||
|- |
|- |
||
|[[Minerva's Den (Level)#Map|Minerva's Den]] |
|[[Minerva's Den (Level)#Map|Minerva's Den]] |
||
| + | |[[Minerva's Den (Level)/L0|L0]], [[Minerva's Den (Level)/L1|L1]], [[Minerva's Den (Level)/L2|L2]] {{Icon|yes}} |
||
| − | |{{Icon|no}} |
||
| + | |[[Minerva's Den (Level)/L0 extra|L0 extra]], [[Minerva's Den (Level)/L1|L1 extra]], [[Minerva's Den (Level)/L2 extra|L2 extra]] {{Icon|yes}} |
||
| − | |{{Icon|no}} |
||
| − | |{{Icon| |
+ | |{{Icon|yes}} |
|- |
|- |
||
|[[Operations#Map|Operations]] |
|[[Operations#Map|Operations]] |
||
| + | |[[Operations/L1|L1]], [[Operations/L2|L2]], [[Operations/L3|L3]], [[Operations/L4|L4]] {{Icon|yes}} |
||
| − | |{{Icon|no}} |
||
| + | |[[Operations/L1 extra|L1 extra]], [[Operations/L2 extra|L2 extra]], [[Operations/L3 extra|L3 extra]], [[Operations/L4 extra|L4 extra]] {{Icon|yes}} |
||
| − | |{{Icon|no}} |
||
| − | |{{Icon| |
+ | |{{Icon|yes}} |
|- |
|- |
||
|[[The Thinker (Level)#Map|The Thinker]] |
|[[The Thinker (Level)#Map|The Thinker]] |
||
| Line 174: | Line 174: | ||
If you were to go to 'Welcome to Rapture's' wiki here, you would find this somewhere on it: |
If you were to go to 'Welcome to Rapture's' wiki here, you would find this somewhere on it: |
||
| − | + | [[File:Welcome plasmid.png|650px]] |
|
From this form, the map's must be edited down to remove all of the un needed captions and markings. Don't worry everthing will come back with icons later, but for now i need everything removed except for staircases. Yes that means any piece of the brown background, circus of values markers, health markers, everything. The result should look something like this. |
From this form, the map's must be edited down to remove all of the un needed captions and markings. Don't worry everthing will come back with icons later, but for now i need everything removed except for staircases. Yes that means any piece of the brown background, circus of values markers, health markers, everything. The result should look something like this. |
||
| + | [[File:Welcome to Rapture cuts.png|650px]] |
||
| − | {{Wide image-noborder|[[File:Welcome_to_Rapture_cuts.png]]}} |
||
I used MS Paint to cut everything out of this picture. MS Paint however cannot create the final form because it will leave a white background. To be able to put these to use they will all need a transparent background, which is only possible through programs such as photoshop or gimp. The final form I would like to see the cut-outs in is like this (with the transparent background). |
I used MS Paint to cut everything out of this picture. MS Paint however cannot create the final form because it will leave a white background. To be able to put these to use they will all need a transparent background, which is only possible through programs such as photoshop or gimp. The final form I would like to see the cut-outs in is like this (with the transparent background). |
||
| Line 264: | Line 264: | ||
===Examples=== |
===Examples=== |
||
| − | I saw this map project and I tried to clear the last map (named as "Fontaine") so here it is. Is it good enough for this project ? [[User:Pauolo|Pauolo]] 16:13, July 6, 2010 (UTC)[[File: |
+ | I saw this map project and I tried to clear the last map (named as "Fontaine") so here it is. Is it good enough for this project ? [[User:Pauolo|Pauolo]] 16:13, July 6, 2010 (UTC)[[File:Fontaine (Level) cleared.png|thumb]] |
| − | Another map for today: the Proving Grounds map. [[User:Pauolo|Pauolo]] 19:21, July 6, 2010 (UTC)[[File: |
+ | Another map for today: the Proving Grounds map. [[User:Pauolo|Pauolo]] 19:21, July 6, 2010 (UTC)[[File:Proving Grounds cleared.png|thumb]] |
}} |
}} |
||
| Line 282: | Line 282: | ||
*[[User:Pauolo|Pauolo]] |
*[[User:Pauolo|Pauolo]] |
||
*[[User:Wass12|Wass12]] |
*[[User:Wass12|Wass12]] |
||
| + | *[[User:Mainframe98|Mainframe98]] |
||
<!--Names go above here.--> |
<!--Names go above here.--> |
||
</onlyinclude> |
</onlyinclude> |
||
Revision as of 15:25, 1 December 2019
|
"'Symmetry, dear Steinman. It's time we did something about symmetry...'" - J.S. Steinman
This is a BioShock Wiki project, a collaboration of editors working to improve articles and other content related to a particular subject.
|
This project aims to coordinate the creation of high quality level maps from the BioShock game series for use in level articles. Another (currently inactive) portion of the project is an attempt to create a map of the entire city of Rapture. (For the 'Map of Rapture' portion see the collapsed section below.)
Creating Level Maps
Basic Overview
Creating level maps is a multi-step process. Basically, it involves:
- Capturing screenshots of maps in each level at the highest resolution possible. (See the Map Quality Requirements and Tips section for more information about capturing images.)
- Stitching the map screenshots together in an image editing software if the map is too large for a single screenshot.
- Uploading the map images to the wiki and placing them in the correct map categories.
- If possible, creating an ImageMap with coordinates for each icon on the map and links to articles about the objects the icons represent. (See the Making ImageMaps section for more details.)
- Placing each map image on a subpage of the level article it will be displayed in. (See the Making Subpages section.)
- Displaying the maps in the appropriate level article by using the Tab view extension. (For more about using Tab view, see the Tab view Format section.)
Detailed Guidelines
Map Quality Requirements and Tips
- When taking screenshots of a map in BioShock 2 and its DLCs, always zoom in as far as possible on each level and take as many overlapping screenshots as are needed to capture the whole map.
- Do not use the 'Print screen' button to take screenshots. Instead, use the "Shot" console command to save a bmp screenshot to the same directory as your User.ini file. This will allow you to create much higher quality screenshots.
- Map screenshots should include all icons which have stationary locations. This means that the screenshots should include icons for all vending machines as well as the ADAM corpse icons which can only be seen when the player is with a Little Sister. The screenshots should not include the icons for dropped Little Sisters or quest arrows, since these move around.
- Once you have all the needed screenshots, piece them together in an image editing software.
- For a map with multiple floors, create separate layers for each floor. Make sure that all overlapping rooms line up correctly between floors.
- Make sure that the colors of the map background and rooms are consistent. When you are standing in a room in game, the color of that room will flash on the map: do not let this color change appear in the final image.
- Crop the image so that there is very little extra space besides what is needed to show all rooms in all levels.
- Save each layer as a separate image with a name that clearly describes the level name and floor number. As an end product, you should have high quality images of each floor which overlap perfectly and are the same dimensions.
Making ImageMaps
ImageMaping makes the icons on a map clickable links to pages with more information about the objects the icons represent. For a detailed explanation of creating and using ImageMaps, see the MediaWiki article about the ImageMap extension: MW:Extension:ImageMap. Various online utilities exist for making ImageMaps, and there are also ImageMap plugins for image editing software such as the GIMP.
For this project, ImageMaping is especially useful to display custom maps that have added icons which show Audio Diary, Tonic, and Plasmid locations.
- Each vending machine icon should link to the article about the specific type of vending machine.
- Icons for ADAM corpses should link to the ADAM article.
- Added icons for Audio Diaries should link to the specific Audio Diary transcript page, and the title of the link should include the name of the Audio Diary author.
- Added icons for Tonics and Plasmids should link to specific Tonic or Plasmid pages.
Making Subpages
A map image must be placed on a subpage before it can be displayed in a main level article. For example, the map of the first level of the Adonis Luxury Resort is placed on the page Adonis Luxury Resort/L1, which is a subpage of Adonis Luxury Resort. The level number should be the same one it is labeled as in game. For example, the Adonis Luxury Resort actually contains a Level Zero.
For a custom map, the word "extra" should be added to the normal subpage name. For example, a map of the first floor of Dionysus Park with added icons would be placed at Dionysus Park/L1 extra.
On the subpage, the map image should be placed inside of a {{Wide image-noborder}} template using the following format:
- For a plain image:{{Wide image-noborder|[[File:Mapname.png|imagesize|center]]}}
- For an Imagemap version:{{Wide image-noborder|<imagemap>
File:Mapname.png|imagesize
(coordinates and links)
</imagemap>}}
Once the subpage is created, add it to the appropriate category. (Look at the subcategories within Category:BioShock 2 Level Maps for examples of how map categories should be organized.)
Tab view Format
Once all the subpages are created, the Tab view extension is used to display the maps within the level article. See Help:Tab view for a detailed explanation about how to use the extension.
- In the level article, create a "Map" section under a new heading.
- Within the Map section, create a Tab view display with the following format (example from the Adonis Luxury Resort article):<tabview>
Adonis Luxury Resort/L0|Level Zero Orig.||true
Adonis Luxury Resort/L0 extra|Level Zero
Adonis Luxury Resort/L1|Level One Orig.
</tabview> - Always place ||true to the right of the floor that the player first appears in when the level starts. This will make it the default tab that shows when the article first loads.
If many custom maps are created for a level, the number of tabs might spill over into two rows. When that happens, the tabs might need to be specially formatted with code in MediaWiki:Wikia.css. In that case, contact Gardimuer to have the changes made.
Progress Report
BioShock
(All maps already made.)
BioShock 2
| Level | Plain Map(s) | Custom Map(s) | ImageMap |
|---|---|---|---|
| Adonis Luxury Resort | L0, L1 ✓ | L0 extra, L1 extra✓ | ✓ |
| Atlantic Express | L1, L2, L3, L4 ✓ | L1 extra, L2 extra, L3 extra, L4 extra ✓ | ✓ |
| Ryan Amusements | L1, L2, L3 ✓ | L1 extra , L2 extra, L3 extra ✓ | ✓ |
| Pauper's Drop | L1, L2, L3, L4, L5 ✓ | L1 extra, L2 extra, L3 extra, L4 extra, L5 extra ✓ | ✓ |
| Siren Alley | L0, L1, L2, L3 ✓ | L0 extra, L1 extra, L2 extra, L3 extra✓ | ✓ |
| Dionysus Park | L1, L2, L3 ✓ | L1 extra, L2 extra, L3 extra ✓ | ✓ |
| Fontaine Futuristics | L1, L2, L3, L4 ✓ | L1 extra, L2 extra, L3 extra, L4 extra ✓ | ✓ |
| Outer Persephone | L1 ✓ | L1 extra ✓ | ✓ |
| Inner Persephone | L1, L2, L3, L4, L5 ✓ | L2 extra, L3 extra, L4 extra ✓ | ✓ |
The Protector Trials
| Level | Plain Map(s) | ImageMap |
|---|---|---|
| The Adonis Baths | L1 ✓ | ✓ |
| Atlantic Express Train Upkeep | L1, L2 ✓ | ✓ |
| Pauper's Drop Market | L1, L2 ✓ | ✓ |
| Simon Wales' Church | L1, L2 ✓ | ✓ |
| Folly of Dionysus | L1 ✓ | ✓ |
| Persephone Cell Block F | L1 ✓ | ✓ |
Minerva's Den
| Level | Plain Map(s) | Custom Map(s) | ImageMap |
|---|---|---|---|
| Minerva's Den | L0, L1, L2 ✓ | L0 extra, L1 extra, L2 extra ✓ | ✓ |
| Operations | L1, L2, L3, L4 ✓ | L1 extra, L2 extra, L3 extra, L4 extra ✓ | ✓ |
| The Thinker | L0, L1, L2 ✓ | L0 extra, L1 extra✓ | ✓ |
Map of Rapture
| 'Map of Rapture' Project (click to show) |
|---|
OverviewI want to start creating a Map of Rapture, but I can't do it alone. I'm going to need plenty of help, and the glorious part is that none of the work seems to be very difficult, only a bit time consuming. With that said it's only logical that the more help I can rally, the faster we will be able to see results. First thing's first though, for this to be a good, uniformed, and fully interactive map, i need to get floorplans cut out for each level. The map's of each level can be found for the respective location under each games headline (ie: Bioshock > Locations > Welcome To Rapture). If everything goes well, this project will end successfully with that interactive map. For now, let's start with the first step. Phase 1: Map RenditionsIf you were to go to 'Welcome to Rapture's' wiki here, you would find this somewhere on it:
From this form, the map's must be edited down to remove all of the un needed captions and markings. Don't worry everthing will come back with icons later, but for now i need everything removed except for staircases. Yes that means any piece of the brown background, circus of values markers, health markers, everything. The result should look something like this.
I used MS Paint to cut everything out of this picture. MS Paint however cannot create the final form because it will leave a white background. To be able to put these to use they will all need a transparent background, which is only possible through programs such as photoshop or gimp. The final form I would like to see the cut-outs in is like this (with the transparent background). Having each piece separated will allow me to overlap floors. Wherever a staircase would be I can raise the next piece to simulate it being on a higher or lower floor to give a 3D effect along with correct placement and not being stuck with one part of the map permanently blocking the view of a lower level in the same spot. To kick the project off, there is a list of the map's that still need to be edited down and cut apart (rendered) at the bottom of the page. It was time consuming work for me, but the more people that want to help, the easier it will be on all those that do. Please put your signature behind anything that you are working on so we do not waste effort and duplicate work. I've signed off the first 2. All finished and cut apart map images can be emailed to projectrapture@yahoo.com Winston Hoffner 22:06, February 22, 2010 (UTC) Phase 2: LayeringHello, I'm Trace Barkley. I sorta just jumped into this project and organized the page. I have photoshop and am willing to layer the maps, all I need is a render (like the one above of welcome to Rapture) to start. I do not need the pieces separated, just the whole map rendered. The below designs are currentley still in need of approval by Winston, but are what I interpreted he wanted the maps to look like. ") First Floor ") Floor 2 ") Floor 3 As you may have noticed, each map had a different 'floor' darkened and labeled. Which floor a certain part of the map is on is determined by its actual elevation within the game. If I did this right, each 'floor's' darkened areas would be at the same elevation if Rapture were real. I also apologize for the hugeness of the maps and the empty space; the plane had to be huge in order to keep the map pieces the same size and next to each other. At least now I know why the maps are the way they are in the game. Sincerely, Trace Barkley 21:12, July 5, 2010 (UTC) To Do ListBioShock 1: Welcome to Rapture
Medical Pavillion
Neptune's Bounty
Smuggler's Hideout
Arcadia
Farmer's Market
Fort Frolic
Hephaestus
Rapture Central Control
Olympus Heights
Apollo Square
Point Prometheus
Proving Grounds
Fontaine
ExamplesI saw this map project and I tried to clear the last map (named as "Fontaine") so here it is. Is it good enough for this project ? Pauolo 16:13, July 6, 2010 (UTC)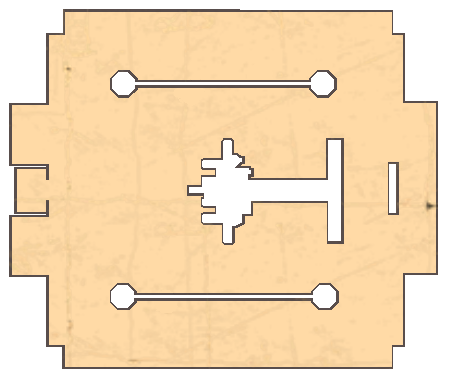    |


_cleared.png)
Project Participants
If you are interested in contributing to this project, simply add your signature by typing “~~~” below. Place every participant on a new line.
- Inactive
- Active